Showing posts with label Brake Lines. Show all posts

Monday, November 11, 2013

Brake Master Cylinder

The brakes on the first few test drives were very very spongy, I had to stomp the pedal to the floor the get the car to stop, especially down my steep driveway. Obviously I want the car to stop as well as it goes so I don't have to rebuild the car everyday after I crash into the back of a late braking truck.

Upon further inspection I found that brake fluid was leaking from the master cylinder into the boot behind the pedal when the system was under pressure, so I knew some seal in there was bad. I ordered a master cylinder rebuild kit and got to work disassembling the cylinder.

Removing it from the car was a lot easier than the clutch master, don't know if it was location or experience but I had it out in under 30 minutes this time. I took it apart a little to just get the thing out of the car. I disassembled the old cylinder preparing to clean and replace the seals inside. It's a relatively simple process of pulling and tapping things out of the bore.


This is the only tricky part, the "Guide Bearing" it's basically hammered tight into the cylinder, so to get it out the only option is to either drill screws into it and try to walk it out (which is what I did obviously) or supposedly you can melt through it with a soldering iron, if you go that route use a respirator. My only lesson I can pass on is when you choose your screws make sure you go for a small diameter coarse thread, and be very careful of your angle, you don't want to scratch the piston if you can avoid it. You aren't worried about salvaging the bearing because a new one is included in the rebuild kit. Once the guide bearing is out the only tricky part is a circlip way down the bore, but with a pair of circlip pliers and a good light source it shouldn't be too tough. Once everything was out I had a bag full of parts.


 Now everything was out, time to start cleaning up the cylinder. I know it's a hydraulic component deep in the bowels of the engine bay that nobody can see and surface peeling or rust makes no difference to it's functionality. I'm just fanatical about making everything shiny and new, sorry.


Now doesn't that look so much better? Once all the gunk and rust was removed I took a bottle of brake cleaner to the whole bore and all the ports, using small wire to clean all the passages too. The aluminum (I'm assuming it's aluminum since it was so soft) was really pitted under the paint, so Instead of clear coating it I decided on a thick valve-cover paint to hide the flaws. Taped up the important parts, primed and painted. While all that was drying I set to work on the internals, the seals, springs, and rings.

The primary piston, pulled from the bore (it takes some force)

close up of the front piston, notice the directionality of the seals, very important

all the circlips, washers and spacers from inside the bore.

The paint dried, I'm very very pleased with the results, my tape job could have been better but the paint did exactly what It was intended to and covered up the pitting nicely.


Just set on top, the gasket between the reservoir cap and cylinder was obliterated in the removal process, and the rebuild kit didn't include one. So I made my own, I had to end up doubling up because one layer was too think.


bought 6 new bolts and locking washers, stainless steel this time.


The exterior done it was time to put the piston assembly back in. This is a difficult process, and I had to literally hammer in the new guide bearing using a deep well socket to go around the piston.

In the process of getting the piston back into the bore I chipped the paint. I'm still cursing myself, I may sand the area and try to repaint it later.


During the reconstruction somehow the primary piston got jammed and wouldn't return, we used a syringe to inject a small amount of brake fluid into each of the valves and both my dad and I pulled on the piston trying to break the seal. 30 minutes of forcing fluid into the system and pulling on the piston we got it to break free. Once it was fully extended we put back on the reservoir bottle and hose, plugged up the valves with random bolts and filled the cylinder. I'm letting it sit still, giving the fluid time to percolate into all the places that it was cleaned from before trying to get it to pump fluid again.

Friday, July 19, 2013

Brake Lines, Bleeding

After replacing the whole passenger's side hard brake lines, from the master cylinder to the back drum, I went to bleed the system. Soon as we started the drivers side line in the Swiss-cheese panel and halfway through the cabin ruptured; nothing can ever go easily. So that all had to be replaced, but like I did on the passenger side I replaced the 60" single hard line from the bulkhead to cylinder with a 12 inch line from the cylinder through the firewall, connected to a 51" straight line to the Swiss-cheese panel. Once all the lines were replaced we were close to bleeding the system and hurricane Scott struck again, as he was tightening the brake-line into the drivers drum he sheared off the bleeder screw... again. So the whole drum came off, thankfully the screw had sheared in such a way that we could pretty easily get it out, then replace it.


Once all the line were in and we tightened up any places with leakage we were ready to bleed the brakes. The process took quite a while since all the lines were completely dry all the way to the back two drums. As we were bleeding Scott found a hole in the boot behind the brake pedal that was leaking brake fluid, but it was a very very slow leak that only put fluid through when the pedal was pumped. Chances are the seal underneath the boot isn't perfect, so that will have to be inspected and hopefully won't require a whole cylinder rebuild... again.

Monday, July 15, 2013

Brake System

The last post was very in depth of the refurb of my front driver's side caliper, the 2 back drums and other caliper got the same treatment, once that was done I went to bleed the brakes and one of the lines under the Swiss-Cheese panel ruptured.


So with one line ruptured I decided to replace the hard lines that go to the drums as well since they were easy to access and looked in a bad way. I got the new lines on Saturday night but when I went to bleed them Sunday morning they were dripping, not a huge leak but enough that I needed to sit down and tighten the ever-loving piss out of them. One of the lines running along the floor of the pan seems to have a bad thread and wont tighten down to not leak, so I'll probably have to replace it too.

Before:


After:


Monday, July 1, 2013

Brake Refurbishing


So with the Sonett capable of moving under it's own power an important part now is making sure it can also stop. I live on a gigantic hill, about a 45 degree angle, steeper in places, so a good set of brakes is pretty important.

So first was the front disc brakes, I had to check if the pads were still good as well as clean off the massive amount of rust and repaint them.


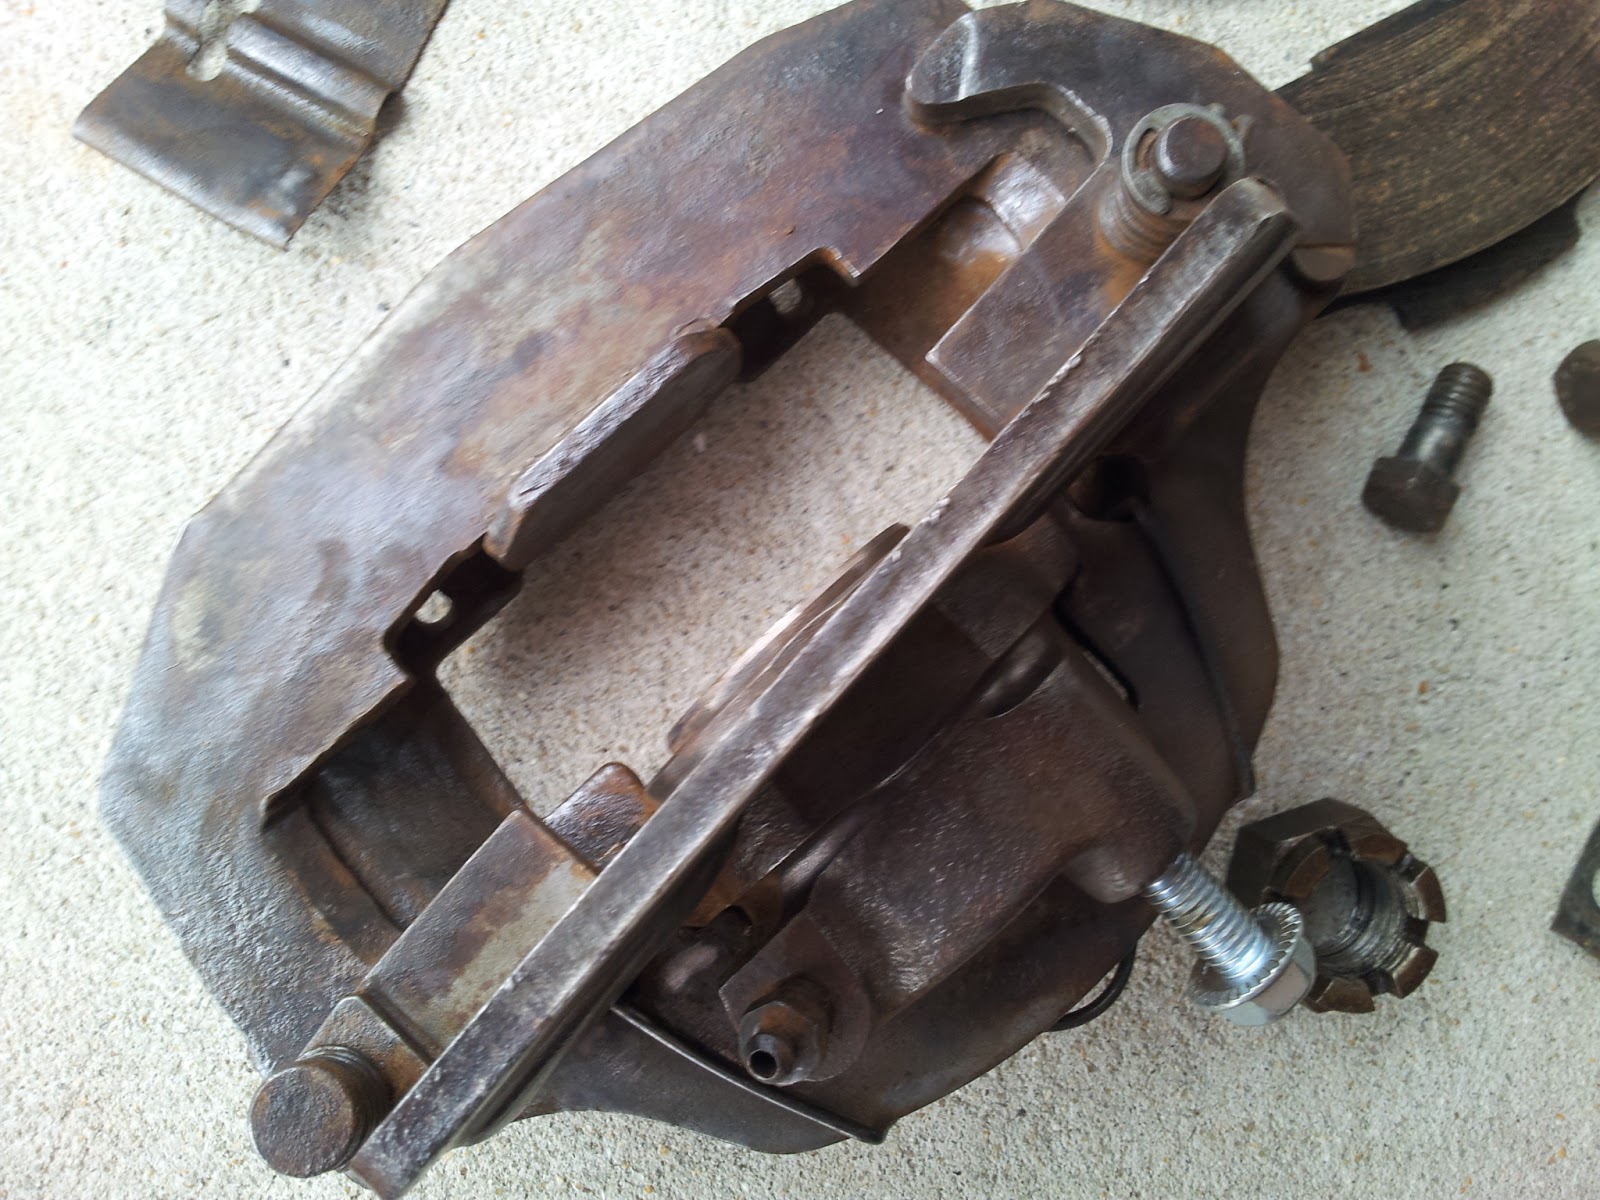
The caliper was absolutely disgusting, covered in spiderwebs, dirt, grime, rust, and dust. So I blew the whole thing out with the air-compressor, and cleaned it off a little bit with some brake cleaner. The bolt you see there is occupying the hole for the brake line, just to make sure no rust/dust/dirt/etc got in there.


Once the caliper was off it was easy enough to remove the pads and check them. They look pretty near brand new, makes me think the guy before me replaced them and then never drove the car. They got sprayed and wiped over with brake cleaner, a little bit of sandpaper on the surface to add a tiny bit of grip.

Next the whole caliper and all it's loose parts got gone over with the wire brush, it didn't even look like the same piece of metal after I was done with it.


Once the caliper was wire-brushed back to metal I wiped off the rust/dust and air-blasted it with the compressor. Then I sprayed it with Krylon anti-rust, high temperature resistant black paint, I thought about painting them red or some other performance caliper color but I had black and I'm not that flashy.


Once everything was painted and dried I reassembled the caliper, slide in the pads and it was ready to bolt back onto the rotor.


I reattached the brake line (after cleaning it of course) and bolted back on the caliper. I cleaned the rotor and everything else I could reach with brake cleaner. Repainted the suspension spring, tie-rod, and  A frame after wire brushing off the rust. Cleaned off the frame around there with water and had one good looking wheel arch area.

Before:

After: