Wednesday, October 1, 2014

Transmission is Terrible

So I'll start this post with a disclaimer: SAAB V4 transmissions and transaxles are NOT weak. This is a conception I come across just about everywhere I've done any research in forums and anywhere else. They claim that these units just fall apart. They are strange, they have components that don't really benefit them (cough freewheeling hub) and some of the design is highly questionable (bushings that have no way of keeping their lubrication), but they are plenty strong. I base that they're plenty strong on first hand remarks from both Mark Ashcraft and Tim Nines, both of whom have used Sonetts in Motorsport, with greatly boosted engines (125+ hp) and never had problems with the transmissions keeping up, Nines said he broke axles before the trans-axle gave up the ghost.

Make no mistake, they are finicky. The freewheeling hub remains a problem child until it is neutered, and the the shift bushing on the outside transmission itself has no grease fitting and tends to give up sooner than similar units in other cars. They need fresh gear oil, more often than you change the motor-oil. Ashcraft recommends changing your gear oil every month and using synthetic Amsoil 80-90. Synthetic oil is going to do what it's designed to do: fill every nook and cranny it can get into (read: it will find any holes/cracks in gaskets or other seals.).


You may remember, or I may have not posted anything about it (oops), the latest with the transmission had been that it wouldn't get into gear. To refresh: when I was working on prepping the door sills for paint I backed the car down my hill (which is stupidly steep) to turn it around and work on the other door sill, at the bottom rolled to a stop, went to shift into first to turn the car around and heard the awful sound of gears grinding. From that point on the car has not gone into gear. At first every signal indicated that it was a problem with the clutch control system, the slave was leaking and the pedal wouldn't hold pressure. That was all rebuilt bled and tested, not the issue. The next thought was linkage, the collar on the shift linkage was hitting the shift tower and it never felt like a gear was even being selected. We jacked the front end off the ground and tried to see if we could feel through the wheels any kind of moment in the transmission when the shifter was moving, nope. We could look down and see the linkage on the outside of the transmission case moving so it wasn't bound up. After fiddling with the linkage for several hours I placed a befuddled call to Ashcraft.

He walked through all my symptoms and was equally perplexed unless the problem was with a selection fork inside the trans being worn down or broken, in which case I would have to pull the motor and trans (which I very much wanted to avoid) and have the transmission rebuilt. Then he had a eureka moment and asked about the freewheeling switch, which had totally slipped my mind. I sprung for his 50$ book on transmission diagnoses and fixes, which so far has been quite helpful.

Quick lesson: the SAAB V4 trans-axle has a freewheeling hub, a remnant from the 2-stroke Sonett days. Honestly SAAB couldn't be bothered to redesign a new transmission, for god's sake these cars were already being built with the bits they had just lying around, so they reused the two-stroke transmission. The free-wheeling hub is a gear in the transmission that actually turns the axles. For the car to actually accelerate the car the flywheel has to exceed the rotational speed of the freewheeling hub for the centripetal force to propel the car forward. This is an excellent design for a two-stroke motor, it makes it so applying the gas (to keep the engine from seizing) while braking when going downhill is no longer the most terrifying, seat-browning experience because unless you really jam on the gas the car won't accelerate faster than gravity is pulling it down the hill. However this feature introduces more points of failure into an already fairly complex mechanism and is completely unnecessary in anything other than a two-stroke motor. It does allow you to hypothetically drive the car without using the clutch to do anything other than coming to and setting off from a full stop.

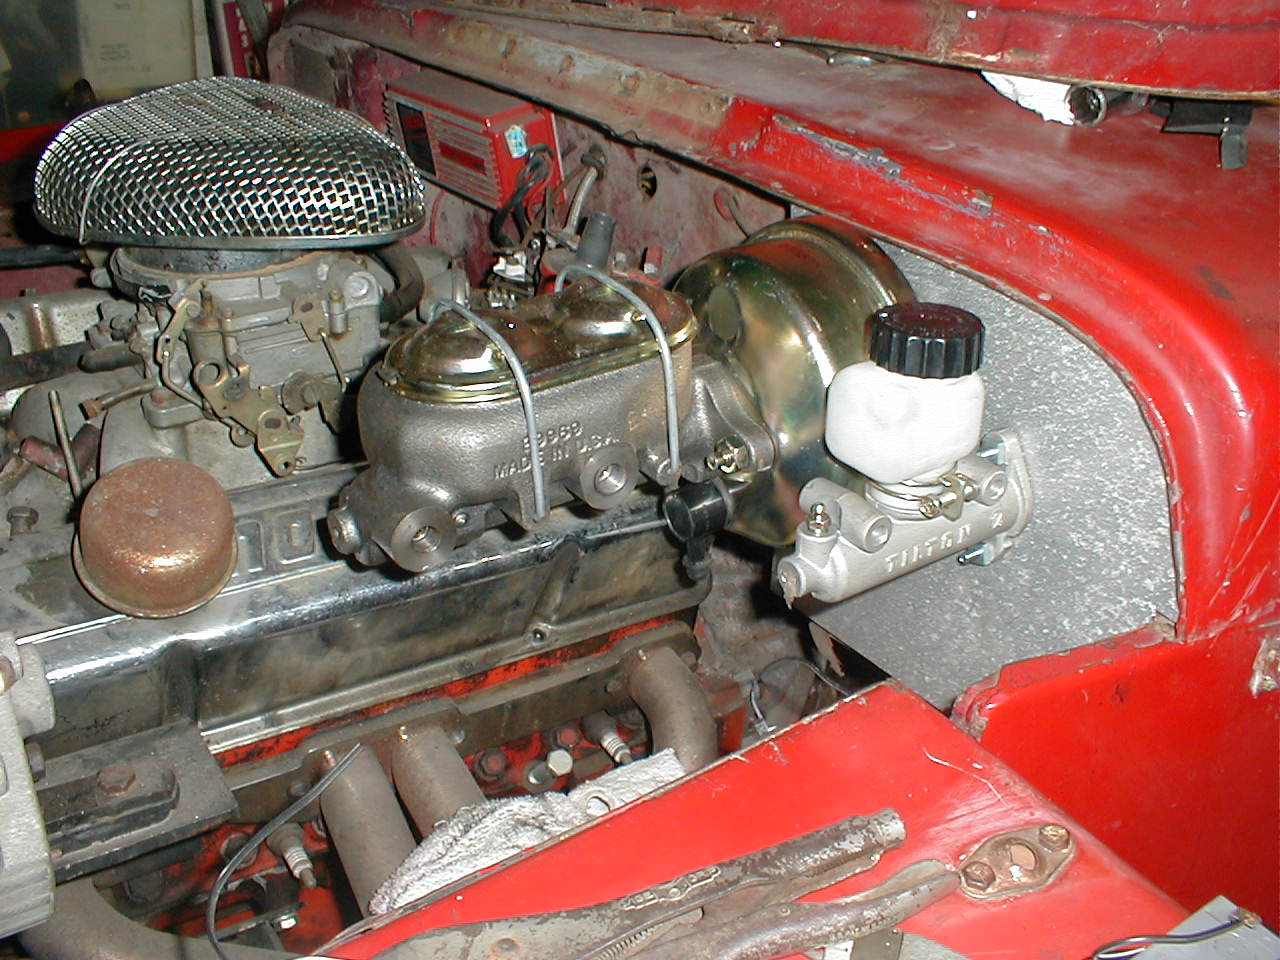
The free-wheeling hub position can be locked out or engaged using a switch mounted on the top of the transmission case. The switch is pulled into the lock-out position (pointing toward the firewall) or pushing into the engaged position (pointing toward the engine block) using a small lever located above the gas pedal. Well it would be if mine wasn't totally missing.


This is what it should look like, rod through a grommet in the firewall

I didn't have one, so I made one. Simple enough, just a piece of rod bent in a vice that I tapped on both ends. Engine side to attach a nut/washer to hold it in the grommet and handle on the other end.


Before tapping I tested fitment and movement, seems to work well.


 Well that didn't fix the problem so I decided before I continued any further I could at the very least change the gear oil. So I put the car up on jack stands, crawled underneath and loosened the drain plug. I used a jack with a block of wood to apply pressure on the back of the ratchet while I yanked on it with the jack handle, made breaking the plug loose a bit of a faff but fairly easy.


While I was under there I did notice this, the flywheel is totally exposed to the road. I really question this being the stock configuration, I would expect some kind of something to protect it from the elements.

Plug is loose now


Gear oil draining, that doesn't look so bad but boy did it sound bad...


Clunk! That's the first batch of metal bits that came out with the gear oil. They look fairly important, and at the very least shouldn't be bouncing around in a transmission. Not good.

So now I know the trans is dead in the water. Something internal has either broken, come lose, or simply fallen apart. That isn't terribly important beyond the fact I'm going to have to pull the drive train and have it professionally rebuilt. So at that point that was the next step. close back up the plug hole, put gear oil back in the tranny so the internals aren't exposed to the air any more. Then I began the arduous process of pulling the motor and trans.

*UPDATE!* The little springs and rollers that fell out here are indeed from the free-wheeling hub inside the trans-axle. Further lending proof to the fact that the hub needs to be neutered so it doesn't break other stuff.

Taillight Wiring

So I was actually smart about this. The stock harness for the taillights hadn't been butchered, so I save it and just cleaned it. I cut off the stock 5 (or 6?) pin connector and soldered on a new 6 pin connector I'd bought so I could connect the old harness to that section of my newly created harness. I waited to do this when the back body was back on so I could be sure all the wires were the correct lengths. This lead to some interesting soldering conditions....


Installing the taillights themselves is a very easy process, the frames actually have "R" or "L" on them to help you figure out which hole they go in, but even without them it's fairly easy to figure out what goes where. The extra beauty of them is that the lenses screw on after the frames are already bolted onto the car, so you can install the bulbs and test everything before you finish them off, not that taking back out those two screws would be  a huge deal.

After they were installed, with new bulbs, and the lenses were cleaned and installed I turned on the ignition and tried all the lights. Brakes lights: check, reverse lights: check, license plate & outer running lights: check. The left brake bulb didn't come on at first but it was simply due to a slightly bent contact on the socket, you can see the contacts on the back of the frame if you look from inside the trunk. Simply remove the bulb and gently push the contact forward, then when you install the bulb it'll push the contact but remain in contact, problem solved.


I repainted the trim pieces that go around the the lenses black because the silver on them was fading and frankly looked kind of silly with the white.

Friday, September 26, 2014

Door Latches, Stoppers, and Locks

Now that the doors are on the car, it seemed pertinent to make it so they wouldn't open too far and mess up the freshly repaired door-skins, and not fly open when I'm going down the road. So I dug all the hardware for the latches and door stoppers out of my various bags of parts.

*NOTE* The following should all be done BEFORE the door skins go back on the doors. You'll want the doors to be able to open beyond where they will when you're done (like 150 degrees) and getting to the internals of the door from the outside makes things 100 times easier!


Pro-tip, anything that comes off the car for any period of time longer than 1 hour, bag it and tag it. You will regret not doing it later when there are thousands of tiny bits of metal with no easily discernible meaning or function.

I found that one of my door stoppers was missing. It didn't come with the car, as I get into these smaller system this is becoming something of a trend.


So above is the stock stopping bushing. Not pictured is the shim that fits in the slot you can see in the backing plate. Well the good news was I had one stock one to base my new stopper on, all it is: a rubber grommet with a metal backing plate (to protect the rubber from the pin that hold the whole assembly in). So I cut out a new shim, drilled holes in it for new pins (a bolt/nut) and instead of a square chunk of rubber I just used a thick grommet from the hardware store.


That was the easy part. This assembly slides into a small slot in the bottom hinge from the door sills. In the top of the door hinges is a small slot with a hole to put the pin through and mate the shim to the door hinge, you then push the shim through that slot in the door sill and close the door. Then with your patented SAAB mechanic's left/right arm with 2 to 3 more universal joints than the normal human you reach in the speaker hole to the recess where the shim has come through and slide the stopper on with the backing plate facing the front of the car, slot in the pin (bolt) and test it. 

The stopper should do just that, your door should no longer be able to open more than 70-80 degrees. Any more and when you open the door you'll gash two huge holes in the front of the door skin.


Next up was door latches, good news was the latches on the doors were already installed, if you don't do this when the doors are off the car so long as you don't have the windows in yet you should still be OK. The only other component is a striker plate for that latch to grab onto, it just is held to the frame by 4 crown bolts threaded through a backing plate with threaded holes to match, Think a big block 4 way nut. This process is tricky by yourself trying to get the bolt through the right hole and into the right spot on the backing plate, and then thread it without anything falling.

The strikers mount with the rubber bushing up facing down (see diagram at the beginning of this post). Once the strikers are on as tight as you can get them with a screwdriver (they're holding the door shut, there is no "too tight" long as you don't destroy the fiberglass) you'll want to check the fitment of your door. Gently try to close the door and pay special attention to where the latch meets the striker.  Adjust the door in the gap with the two large nuts (24 mm?) that hold the door frame to the hinges, there is a large thinner nut on the hinges on the outside of the door frame on the hinges that you'll really be playing with for these adjustments.

This is a process that is one part insight, then a bunch of parts guess and check. You can know which nut is gonna change what, tightening the top nut will pull the bottom right corner of the door up and right, tightening the bottom one pulls the same corner down and to the left. Obviously adjusting them the same amount moves the frame side to side in the frame. You'll know when they're aligned right when you can get the door to latch smoothly with a light swing of the frame, you may have to make slight adjustments to get the door-skins to line up with the body later, same process.

Tuesday, July 29, 2014

She Looks Like a Car Again!

With the bulkhead cover on, the roll-bar bolted in, the doors aligned and bolted in there was nothing stopping the rear body from going on. With help from two of my friends we ever so carefully slide the back body back on the car.

As we were snugging everything up I realized that I had put the windshield wiper spindles on backwards. The way I had them would force the spindle gear housing to be visible through the windshield, well if they hadn't been so flush to the body that the windshield could have been install. So with the other two gently holding the front area up I took apart the spindles and re-threaded them the correct way.

At this point I had been working with minimal stops for 6+ hours and it was past midnight. There needs to be sealer put all around the body so water, dirt, and debris doesn't get between the fiberglass and the chassis. So that will be done at a later time and the body bolted and riveted on more permanently.

This is the most satisfying picture I've taken yet. Nothing like stepping back and it no longer looks like a monocoque sand-rail... she looks like a car.


If you need the steps to put the body back on you can use the guide to take it off from VSAAB, but obviously in reverse. http://www.vsaab.com/html/Articles/sonettbody.htm

Bulkhead Cover, Roll-bar, Seatbelts

I took the bulkhead cover -that goes over the gas tank and swiss-cheese panel- and had my grandmother (who has an upholstery machine, which kicks ass) sew on some strips of heavy-duty Velcro so that I didn't have to glue it down. That way should I even need to get into those brake lines, fuel lines, or the gas-tank I don't have to deal with glue.

For some reason this cover must have been recreated (rather closely actually) based on an original but had no holes for bolting on seat-belts or the roll-bar so I carefully cut some. With that done it was simply a matter of bolting on the seat-belt hardware and the freshly painted roll-bar.


Doors On

One of my fathers coworkers recreated my rotted door-gutters in 1/8" stainless steel from scrap they had laying around, so when I got them they just needed to have holes drilled to fit in the doors. Well if you didn't know stainless steel isn't easy to drill through. After burning through 5-6 bits I got all the holes drilled, painted them with the same enamel/ceramic mix I used on the trunk pan.

for those of you who don't know: all metal work should be done barefoot/flip-flops. It's the only way to do it. Don't believe me? Check out the editor of Hot-Rod magazine...

Once the paint had dried it was simply screwing them into their spots on the door sills.


With the headliner done, the door sills painted, and the new rain gutters bent, cut and drilled, there was nothing stopping the doors from going on. So that seemed like the thing to do. First I taped all the edges up with painters tape so any unintentional metal on metal contact wouldn't remove paint. I used some spare headliner as padding during the fitting process as well.

Lined the hinges up in their slots and hammered the pins through. Then it was just a matter of adjusting the door's position by tightening or loosening the 24mm nuts on each hinge. Once they were moving in and out freely without hitting anything I removed the padding  (left the tape for now).

The next step is putting the stopping hardware back together so that the doors only open as much as they're supposed to. If you don't install this stuff right the doors will open too far and go straight through the fiberglass skins, not good. I didn't have any of this hardware except a single shim to use as a guide for the other one. So I created a new shim for the passenger door and made a pair of tiny pins by shortening a bolt and grinding the top of it down. Now I've just gotta figure out how to imitate the rubber stoppers on the other side...

That little bugger


Headliner

I knew I needed new headliner but instead of going with the stock foam backed vinyl headliner I went with the more modern automotive headliner you can buy at most fabric stores. Partly because it's supposed to be easier to install and partly because it actually serves as a sound deaden-er and insulator.

So I set the back body down on a bunch of blankets to protect the paint upside down. I tried brushing on the 3M glue I bought. This is not the rattle-can stuff you get at automotive stores, it's "3M Scotch-Grip High Performance Contact Adhesive 1357"  which comes in a paint style can. This stuff is a gnarly green and smells like, well glue, but it seems really strong. Supposedly everywhere I read recommendations were talking about a yellow 3M glue for headliners and that's not what I ended up with. It seemed to work but I would try to find that stuff instead if you can.

I tried to brush it on at first but this stuff gets tacky so fast when exposed to the air that the brush starts clumping it on way to thick. Then it shows through the brown headliner I've chosen. So I went to Harbor Freight and bought a cheap little 15$ spray gun, dumped the glue in and and sprayed it like that.

The trick is to spray the surface, use some kind of spacer, like cardboard stripes of wood dowels, and make sure the headliner can go over that whole area without bunching up or adjustment. If not, adjust, if it fits you fold it back spray more glue directly on the foam backing then slowly stick the glue side to the surface. Pull the material tight as you press it down, it helps to have somebody hold tension while you press the glued surfaces together.

Mine didn't come out perfect because it's the first time I've ever done it, I was by myself, and my spacers were crap. That being said it still looks good, and is a hell of a lot better than the raw fiberglass.

After it had dried for a day I poked holes into the correct spots and screwed in the rear-view mirror and sun visor.

Trunk Pan Finished

So my last post showed the trunk pan mostly welded in but before I could get all the seams finished and be comfortable with it really being structurally in the car the welder I was using crapped out.

Well I thought it crapped out, turns out it was just out of wire... Awkward. Guess that's what happens when you're using tools you're not familiar with.


So the pan was all welded in so I ground down the beads of the welds so they weren't quite as obvious and sat flush to the pan. Then I had to prime it so the steel didn't rust. Just in the few days the pan sat in the it started to flash surface rust, so I wire-brushed all that off and primed it.


Then I had to deciede if I just wanted to repaint it black or cover it with FatMat. I opted to kind of do both. I FatMat'd around the sides but not the pan itself since the bends and welds there were so pretty. I used engine enamel with ceramic to paint the pan and was actually so pleased with it I repainted the gas tank while I was at it.


So now I have a trunk pan I can jump in and not go through the floor. Now to get a battery tray so it stays that way...

Tuesday, July 8, 2014

New Trunk Pan

I finally caved bought the $300 weld-in kit from Ashcraft, After calling every metal shop within 100 miles and nobody said they could/would do it. I just don't think they thought a 20 year old college student was serious about fabricating a trunk pan for some weird Swedish car more than twice his own age. Well I was serious and you lost some pretty easy business, it's just putting corrugated bends in 1/8" thick steel with a metal brake!

Ashcraft's kit does require a little bit of customization to get it to fit perfectly, IE putting the ridges in the L-brackets that support the pan. I also found that my side L pieces and the pan itself were about 1 1/4" too long. I cut the excess off and they snugged right in.


This is literally the second or third time I've ever MIG welded in my entire life. Not bad if  I do say so myself.

All the L's beating roughly into shap and welded in. This was dirty, hot, exhausting work and my forearm was sore for days from all the hammering.

Pan is welded in all along the top. Was in the process of doing all the seams underneath to add even more support and reduce places for water to seep in when I ran out of wire. Once I get more I'll finish up these under seams, grind the bead off my weld, prime, paint and the trunk is done.

Thursday, July 3, 2014

Last Few Electical Gremlins

Even after completely redoing the whole wiring harness for my car there were a few issues:

  1. The "Charge" light on the combination gauge would come on the moment a battery was connected, it should only come on if the alternator stops producing the proper amount of voltage.
  2. Brake Light sensor isn't transmitting signal properly when the brakes are on.
  3. Tachometer isn't working at all and is missing all of it's internal light bulbs.
  4. Fuel level sensor isn't properly sending signal
  5. Oil Pressure sensor isn't properly sending signal
  6. Water temperature isn't properly sending signal
So lets start delving into the issues and how I've gone about fixing them, those that are fixed.

#1 Upon further inspection of the wiring diagram wires got crossed and the wire to the light was not on the correct terminal, once it was moved and re spliced correctly battery is connected and the light doesn't come on.

#2 Brake light sensor assembly works by depressing a small diaphragm inside the screw in to transfer signal from the live wire that comes in to the wire that's attached to the brake lights. The multi-meter says it's not transferring that signal, so chances are that a new one will have to be sourced from the junkyard.

#3 I had to contact Ashcraft about this one because the previous owner had installed an MSD ignition control system, which obviously changes the way the primary circuit should be wired. According to the MSD documentation the lead to the Tachometer should come straight out of the MSD box, while the stock SAAB setup says it should go to the negative terminal of the ignition coil. Well the MSD box set-up wasn't working, and Ashcraft said that the way the VDO tach works is based off a deflection of the 12v signal coming in based off the grounding in the ignition coil. He went on to say that if the wire to terminal 1 of the tach was connected to a wire with a voltage it risks frying the tach PERMANENTLY. So with that concerning me greatly I switched back over to the stock setup. 

First impression was that the Tach isn't fried. It did react to reving and finally moved from 0 when the car started up. However the revs idle at 600, and never exceeded 2000, even when I revved the nuts off the thing. So something isn't reading correctly. So back to Ashcraft I crawled; he suggested switching to a stock style Bosch Blue Type 12 ignition coil (Most commonly know in old Volkswagens) as that's what the VDO gauge is calibrated for. German gauge only read German ignition coil, I could have probably guessed that.

#4 This is still an issue, but may be due to a broken bullet connector in the VDO specific connector, so I'll need to replace the whole thing since you can't get replacement connectors and mine is broken. It's on the list for the next trip to Nine's junkyard. If that isn't the issue the problem lays on the sender side, but I'm really only concerned with getting the electrical issues that are easiest to fix with the body off at this point.

#5 New sending unit was purchased and installed. Suspect gauge isn't working now


#6 New sending unit was purchased and installed. Gauge is suspect.

"Black Hole" Blues

You may recall earlier in this blog that I removed the Clutch Master Cylinder to rebuild with a kit I bought in the mail. Well It was working fine, but randomly one day when I backed the car down the hill to turn it around to work on the passenger side it wouldn't slide back into gear. So after towing the car back into the garage we quickly diagnosed that the clutch slave cylinder was leaking fluid and not building pressure. So off it went to White Post. It came back, got re-installed, and the system was bled. After fully bleeding the system the pedal still would go halfway to the floor with no pressure, not good. So I figure the clutch master is now the issue, chances are the $17 kit from china probably isn't the best. So the master has to come out again.

Most automotive companies when it comes to designing hydraulic brake and clutch control system aim for simplicity and ease of maintenance, at least they did once upon a time. For example check out the location here in a CJ-5, it's so easy to get to, and the reservoir is right on top of the cylinder.


SAAB however, as usual threw convention to the wind and mounted their cylinders way down out of reach, because they know better. The master cylinders -both Clutch Control and Brake- in the Sonett are mounted right behind the pedals on the engine side of the firewall, down behind the trans-axle, beside the transmission, underneath the steering rack. The fact that I have to list 3 things that they're near should be a giveaway how impossibly difficult it is to get to the cylinders, never mind getting tools on them. This area is affectionately known among Sonett owners as the "Black Hole" as you put hands, tools, screws bolts, and anything else down there and they don't come back.

Since this is such a common issue Ashcraft sells an access door that allows you to cut a hole in the frame there to get tools on the cylinders but doesn't compromise frame rigidity. So I bought one of those, but it's a custom built part and he didn't have one ready in stock. So I got the instructions and cut the hole so I could go on and get the cylinder out and send it off.


So with the cylinder out off it goes to White Post to get rebuilt. Hopefully after it will let the car go back into gear and then mechanically the car is done.


Friday, May 23, 2014

Paint Gallery

Figured I'd make a post for the sole purpose of showing off the paint I've done. If you're interested in the process and a relatively in-depth "how-to" check out the post before this one.

Headlight Buckets: Clear-coated, waiting for buffing


Door Skins: Clear-coated, waiting for buffing


Hood :Clearcoated, waiting for buffing


Hood: pre clear-coat


Front Body: Needs a smidgen of touch up here and there, then ready for wipe-down and clear-coat


Don't really know how but I got two little slivers of over-spray on this portion of the stripe, I'll fix that today.