After the first drive with no problems it seemed the thing to do was to keep driving the car and find any other problems there might be. Of course on the second drive I went a little further than the first, with water in the coolant system this time. I then proceeded to bog down 500 yards from the house. Thankfully it was all downhill... except the driveway.
Of course this breakdown happened 30 minutes before I needed to leave for the airport, we worked quickly and figured out no fuel was getting through the lines, so a dash of gas straight into the carburetor rolled the engine for a few ticks. During this process Scott tried to use a Styrofoam cup as a funnel... to pour gas. For those of you who don't have any kind of pyrotechnic streak: gas melts Styrofoam and creates a substance almost identical to Napalm. We couldn't get the car up the hill and so threw a tarp over it and left for the airport, with Napalm on Scott's hands: a recipe for success.
After the weekend we got the car up the hill with my brother leaning over the engine spraying starting fluid into the carb as I floored it up the hill, I wish I had a video of the shenanigans.
Once the car was back in the garage I took the whole fuel delivery system off and blew out the lines with WD-40, that didn't solve the problem, still no fuel was passing through the lines. I took both the in-line filter and in-carb filter out and cleaned them both off thoroughly. Then I put a line on either side of the fuel pump to see if that was the problem, no fuel passed through. I took the flex line between the hard line from the tank to the fuel pump off. Blew it out with WD-40 as well. Then Scott blew in the gas tank filler to pressurize the system, we got a solid clean flow through the hard line. So I'd isolated the problem to the fuel pump.
The fuel pump then bolted off and I took it apart. Thankfully it's a mechanical pump not an electrical one, so there are very few moving parts. I took the pump apart and found it had an internal filter, full of rust worse than either of the other filters. I cleaned out all the rust, WD-40'd the entire assembly scrapped off more of the silicone the previous owner puts EVERYWHERE, added my own liquid gasket, and bolted it back on.
A cleaned, rebuilt fuel pump installed I turned the engine over, gas pumped through for a moment and the engine fired into life.
Wednesday, July 24, 2013
Friday, July 19, 2013
The First Real Drive
Once the brakes were all bled we put 4 wheels on, tightened down the lugs, threw the battery in the back connected it and fired her up. She started right up no struggle, tossed the transmission into reverse and rolled down the the hill...
From Scott's POV:
The "Scott get out and push!" is because I struggled to get in into first, and there was a van trying to go the other way. The stop at the bottom of the hill is due to my dog deciding to lay where the car needed to be in the garage.
Andrew in the chase car:
Brake Lines, Bleeding
After replacing the whole passenger's side hard brake lines, from the master cylinder to the back drum, I went to bleed the system. Soon as we started the drivers side line in the Swiss-cheese panel and halfway through the cabin ruptured; nothing can ever go easily. So that all had to be replaced, but like I did on the passenger side I replaced the 60" single hard line from the bulkhead to cylinder with a 12 inch line from the cylinder through the firewall, connected to a 51" straight line to the Swiss-cheese panel. Once all the lines were replaced we were close to bleeding the system and hurricane Scott struck again, as he was tightening the brake-line into the drivers drum he sheared off the bleeder screw... again. So the whole drum came off, thankfully the screw had sheared in such a way that we could pretty easily get it out, then replace it.
Once all the line were in and we tightened up any places with leakage we were ready to bleed the brakes. The process took quite a while since all the lines were completely dry all the way to the back two drums. As we were bleeding Scott found a hole in the boot behind the brake pedal that was leaking brake fluid, but it was a very very slow leak that only put fluid through when the pedal was pumped. Chances are the seal underneath the boot isn't perfect, so that will have to be inspected and hopefully won't require a whole cylinder rebuild... again.
Once all the line were in and we tightened up any places with leakage we were ready to bleed the brakes. The process took quite a while since all the lines were completely dry all the way to the back two drums. As we were bleeding Scott found a hole in the boot behind the brake pedal that was leaking brake fluid, but it was a very very slow leak that only put fluid through when the pedal was pumped. Chances are the seal underneath the boot isn't perfect, so that will have to be inspected and hopefully won't require a whole cylinder rebuild... again.
Monday, July 15, 2013
Trunk Pan
I pulled up the fake Dynamat in the trunk pan to discover (I wasn't really surprised) a large amount of rust on the pan in the trunk, mostly under where the battery obviously had sat. As usual the previous restorer had done a top notch job and not only made the battery's spot the only place with Dynamat he had also obviously not had a battery box and fumes and probably some acid leakage had eaten into the metal.
So I went to scrape the large amounts of rust with the paint scraper when I got to that section under the battery I came into a much more serious problem than surface rust. In several place throughout a 5 ' wide by 1' long section of pan the rust had eaten all the way through, where it hadn't eaten clean through it had thinned to the metal to nearly paper thin. I think right now my plan of action is to cut out this section, fabricate a new one, and weld it in.


So I went to scrape the large amounts of rust with the paint scraper when I got to that section under the battery I came into a much more serious problem than surface rust. In several place throughout a 5 ' wide by 1' long section of pan the rust had eaten all the way through, where it hadn't eaten clean through it had thinned to the metal to nearly paper thin. I think right now my plan of action is to cut out this section, fabricate a new one, and weld it in.
Looks just dirty with Dynamatting...

That's not dirt. Well some of it is

Holey-pain-in-my-ass Batman!

New Battery Leads
So the old battery terminals were so corroded they were literally taking the full charge of a 12V battery down to about 1.5V through the line, so to get past the corrosion I'd been using jumper cables attached further up the wire and then to the battery, needless to say that's not a long term solution. So I got a pair of brass terminal posts to replace the old ones.


Old terminals, the positive is already gone:

Weapons of mass destruction

Pretty new brass posts:

Frame Rust
The floor pans of the Sonett were covered with knock-off Dynamat, I could see in the cracks in the previous owners half-assed insulation/rust prevention attempt and in those cracks was rust. So with a flat head screwdriver and a paint scraper I scraped out all the old Dynamat, popped out the drain plugs in the pan and vacuumed up all the stuff that was stuck under the matting.
As you can see the floor pan was absolutely covered in surface rust, thankfully a good solid tap showed me that the pan was still solid. So I set out to remove as much rust as I could, combination of a wire-wheel, hand sander, and belt sander; both with about 200 grit sandpaper. Then I vacuumed up the rust and dirt that came up, wiped down the area and resprayed it with my probably 250th bottle of Krylon black anti-rust enamel. Now I can sit on the floor pan and not feel like I immediately need a shower, plus it should stop the rust from getting any worse and keep the floor solid.


As you can see the floor pan was absolutely covered in surface rust, thankfully a good solid tap showed me that the pan was still solid. So I set out to remove as much rust as I could, combination of a wire-wheel, hand sander, and belt sander; both with about 200 grit sandpaper. Then I vacuumed up the rust and dirt that came up, wiped down the area and resprayed it with my probably 250th bottle of Krylon black anti-rust enamel. Now I can sit on the floor pan and not feel like I immediately need a shower, plus it should stop the rust from getting any worse and keep the floor solid.
Before:


After some preliminary wire-brushing, sanding:

After a little more thorough treatment:

After Paint:

Brake System
The last post was very in depth of the refurb of my front driver's side caliper, the 2 back drums and other caliper got the same treatment, once that was done I went to bleed the brakes and one of the lines under the Swiss-Cheese panel ruptured.
So with one line ruptured I decided to replace the hard lines that go to the drums as well since they were easy to access and looked in a bad way. I got the new lines on Saturday night but when I went to bleed them Sunday morning they were dripping, not a huge leak but enough that I needed to sit down and tighten the ever-loving piss out of them. One of the lines running along the floor of the pan seems to have a bad thread and wont tighten down to not leak, so I'll probably have to replace it too.


So with one line ruptured I decided to replace the hard lines that go to the drums as well since they were easy to access and looked in a bad way. I got the new lines on Saturday night but when I went to bleed them Sunday morning they were dripping, not a huge leak but enough that I needed to sit down and tighten the ever-loving piss out of them. One of the lines running along the floor of the pan seems to have a bad thread and wont tighten down to not leak, so I'll probably have to replace it too.
Before:


After:


Monday, July 1, 2013
Brake Refurbishing
So with the Sonett capable of moving under it's own power an important part now is making sure it can also stop. I live on a gigantic hill, about a 45 degree angle, steeper in places, so a good set of brakes is pretty important.
So first was the front disc brakes, I had to check if the pads were still good as well as clean off the massive amount of rust and repaint them.


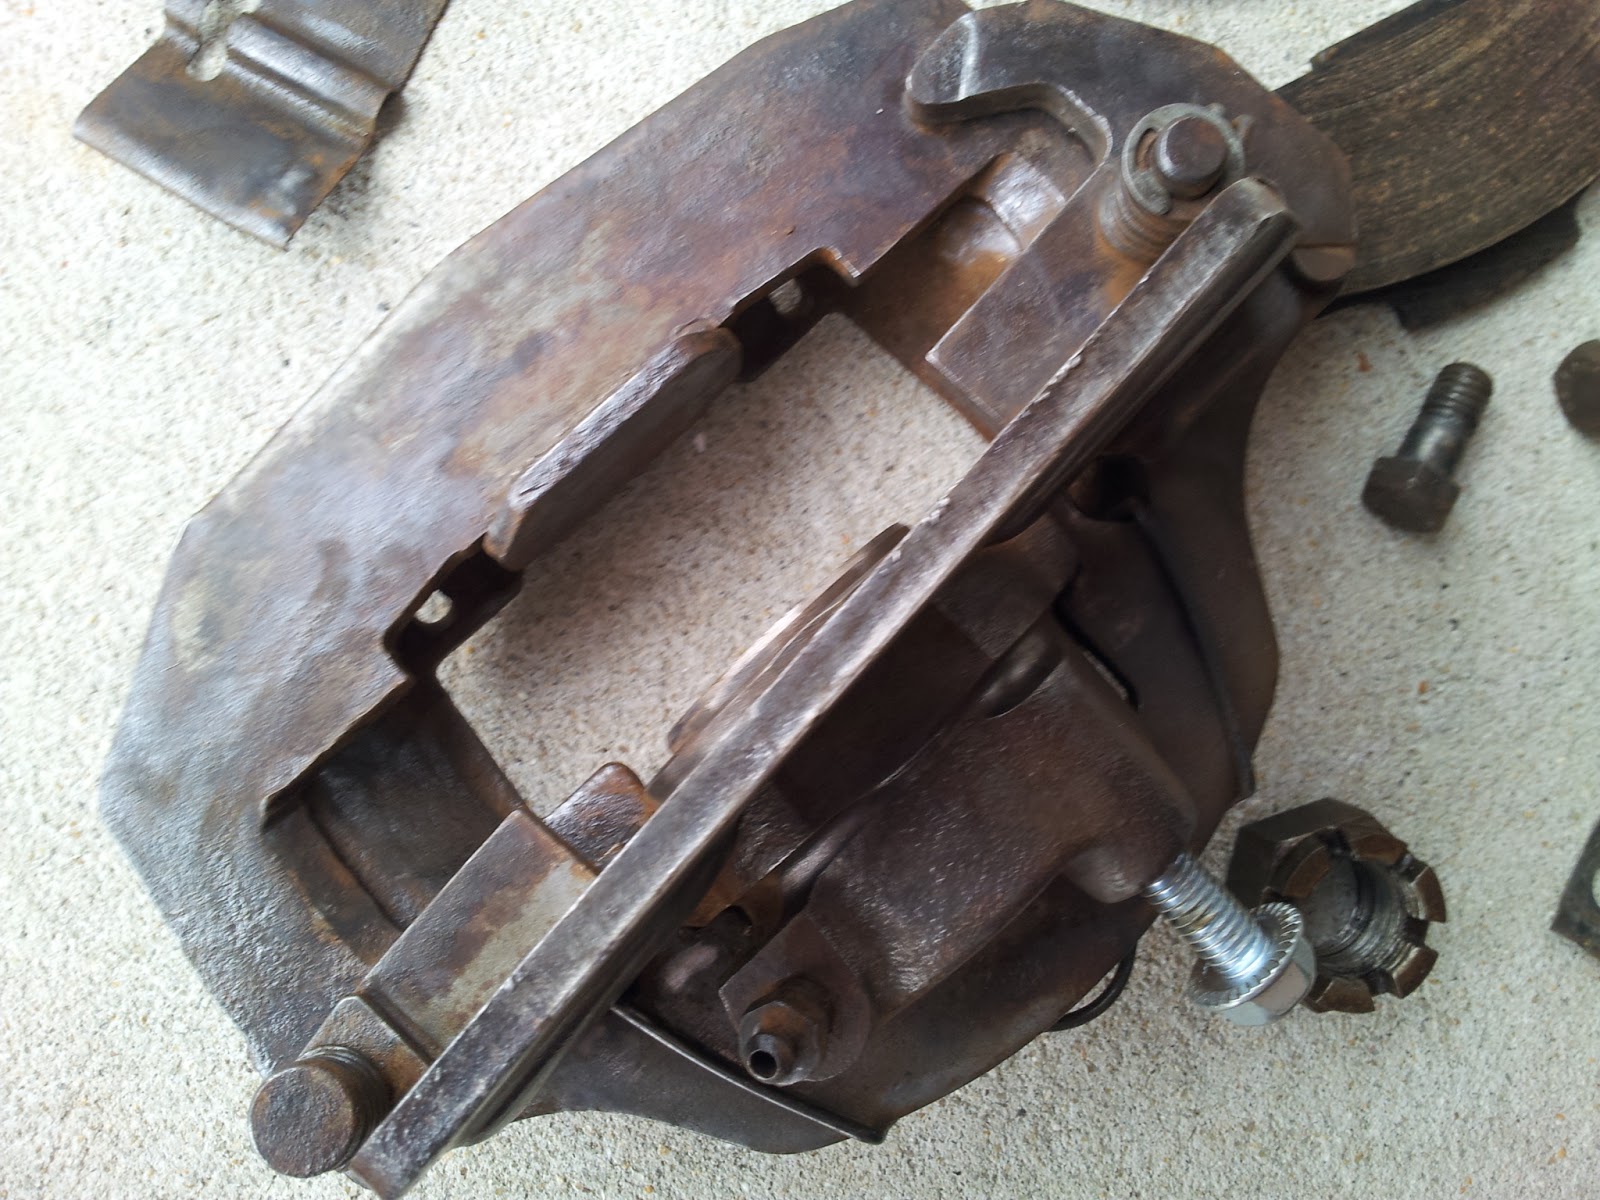
The caliper was absolutely disgusting, covered in spiderwebs, dirt, grime, rust, and dust. So I blew the whole thing out with the air-compressor, and cleaned it off a little bit with some brake cleaner. The bolt you see there is occupying the hole for the brake line, just to make sure no rust/dust/dirt/etc got in there.


Once the caliper was off it was easy enough to remove the pads and check them. They look pretty near brand new, makes me think the guy before me replaced them and then never drove the car. They got sprayed and wiped over with brake cleaner, a little bit of sandpaper on the surface to add a tiny bit of grip.

Next the whole caliper and all it's loose parts got gone over with the wire brush, it didn't even look like the same piece of metal after I was done with it.


Once the caliper was wire-brushed back to metal I wiped off the rust/dust and air-blasted it with the compressor. Then I sprayed it with Krylon anti-rust, high temperature resistant black paint, I thought about painting them red or some other performance caliper color but I had black and I'm not that flashy.


Once everything was painted and dried I reassembled the caliper, slide in the pads and it was ready to bolt back onto the rotor.

I reattached the brake line (after cleaning it of course) and bolted back on the caliper. I cleaned the rotor and everything else I could reach with brake cleaner. Repainted the suspension spring, tie-rod, and A frame after wire brushing off the rust. Cleaned off the frame around there with water and had one good looking wheel arch area.
Before:

After:
Subscribe to:
Comments (Atom)